使用 MNIST and notMNIST 做了一個 AutoEncoder with Fully Connected DNN 的實驗。
依序將實驗結果根據如下步驟顯示出來,程式碼可以參考 [github]
- Data Loading and Plotting
- AutoEncoder Graph Construction
a. Define the input output tensors
b. Define the graph and construct it
c. Define loss and optimizer - Run Session
- Show some reconstructed images
- Plot Embeddings
- Do Image Generation by Decoder
Data Loading and Plotting
MNIST training data 有 55000 筆資料,是一個 28x28 的 image,值的範圍是 [0~1],因此會對 input 都減去 0.5 正規化。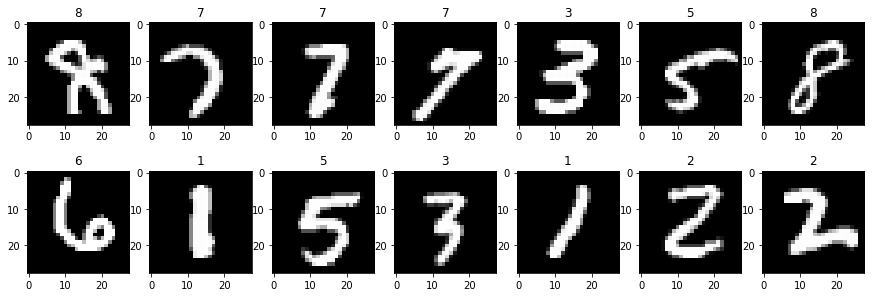
而 notMNIST 整理過後有 200000 筆,同樣也是 28x28 的 image,但值的範圍已經是 [-0.5~0.5]。值得一提的是,此資料還參雜著一些錯誤,如下圖就可發現,第二列的第二個應為 J,但是標記是 A。因此 notMNIST 相對來說很挑戰,但我們一樣可以看到 AutoEncoder 也會做出一些合理的壓縮。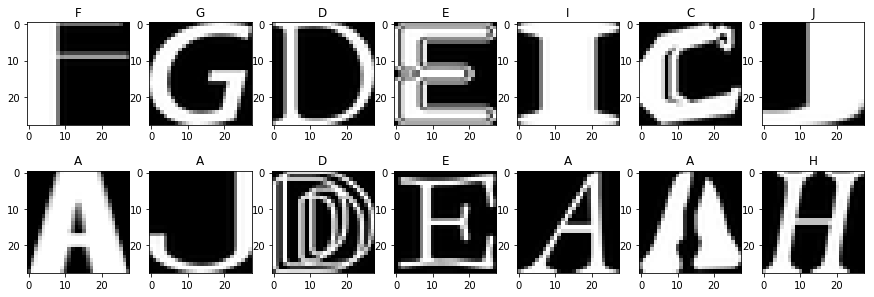
AutoEncoder Graph Construction
Define the input output tensors
Input x 與 Output y 都是一樣 (沒有要做 Denoise AutoEncoder),其中 code 是建立 Decoder 時的 input tensor。
|
|
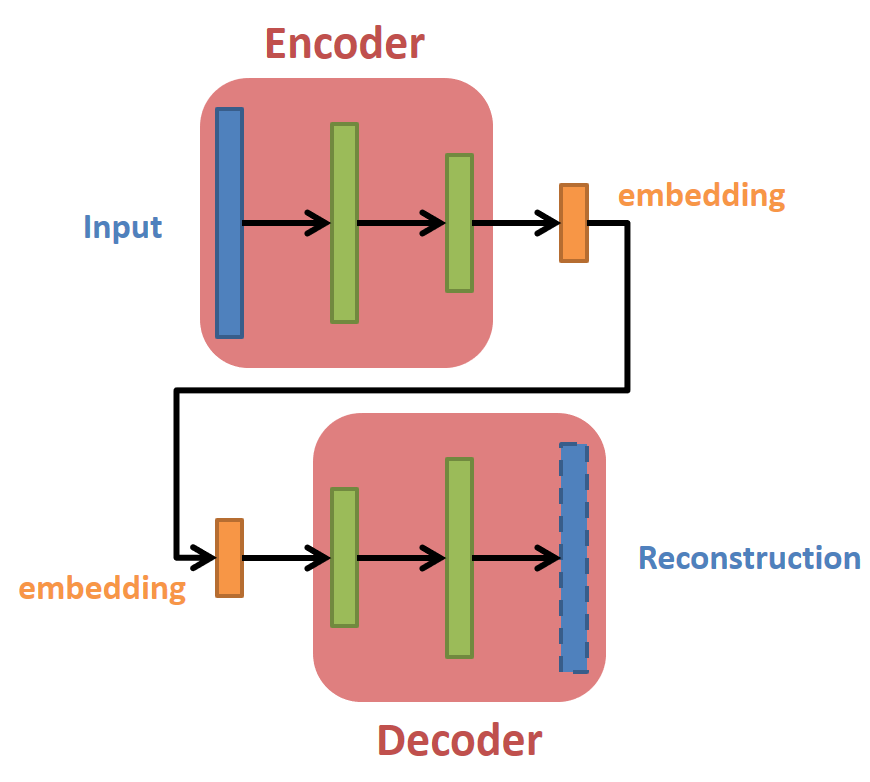
Define the graph and construct it
針對 Encoder 和 Decoder 都使用同一組參數,這樣的好處是參數量直接少約一半,同時減少 overfitting 的機會。當然我們沒有理由一定要將參數綁再一起,可以各自用自己的方法 (參數、模型結構) 去 Encode 和 Decocde。
結構如下:
Define loss and optimizer
注意到 loss 的定義除了原來的影像重建誤差之外,還多了一個 embeddings 的 l2-norm。這是為了希望在 embedding space 上 encode 之後都接近 0,減少那種很大的 outliers 出現。參考李宏毅 Deep AutoEncoder
|
|
Run Session
Adam optimizer 跑了 100 個 epochs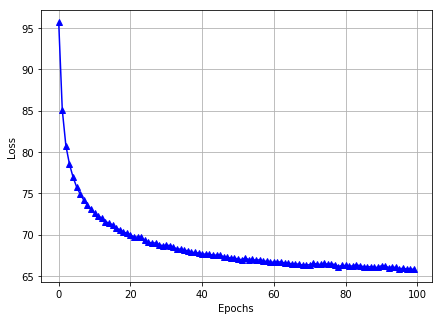
Show some reconstructed images
隨機選幾個 MNSIT 的重建圖: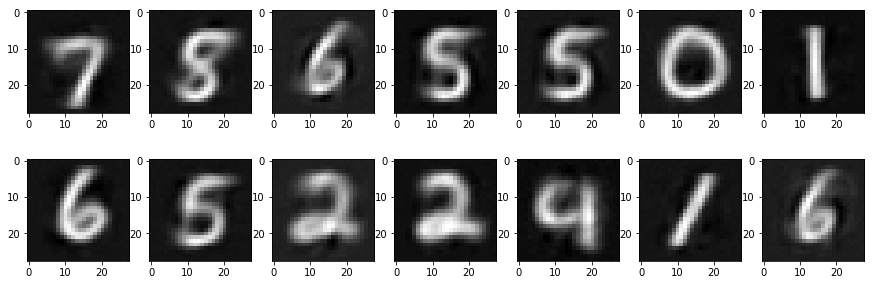
隨機選幾個 notMNSIT 的重建圖: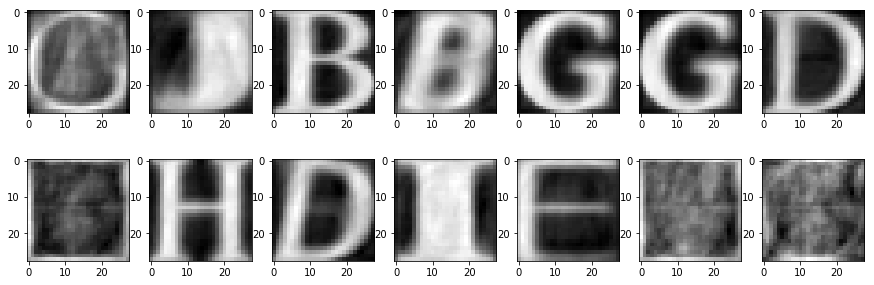
可以看到 notMNIST 果然難多了。
Plot Embeddings
MNIST 針對所有 training data 求得的 2-d embeddings 如下: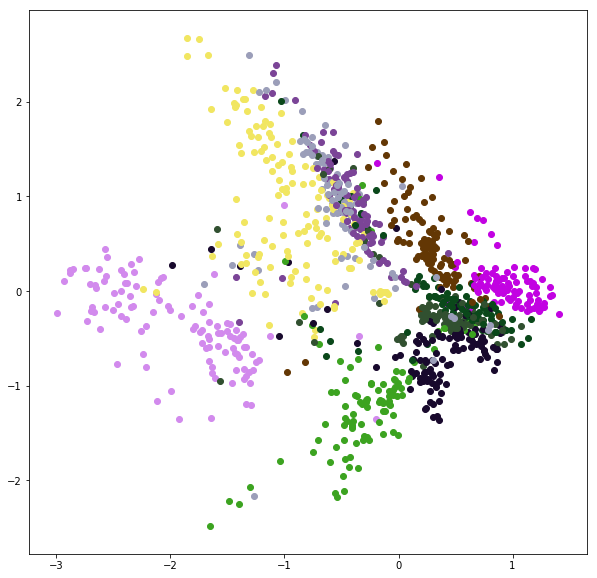
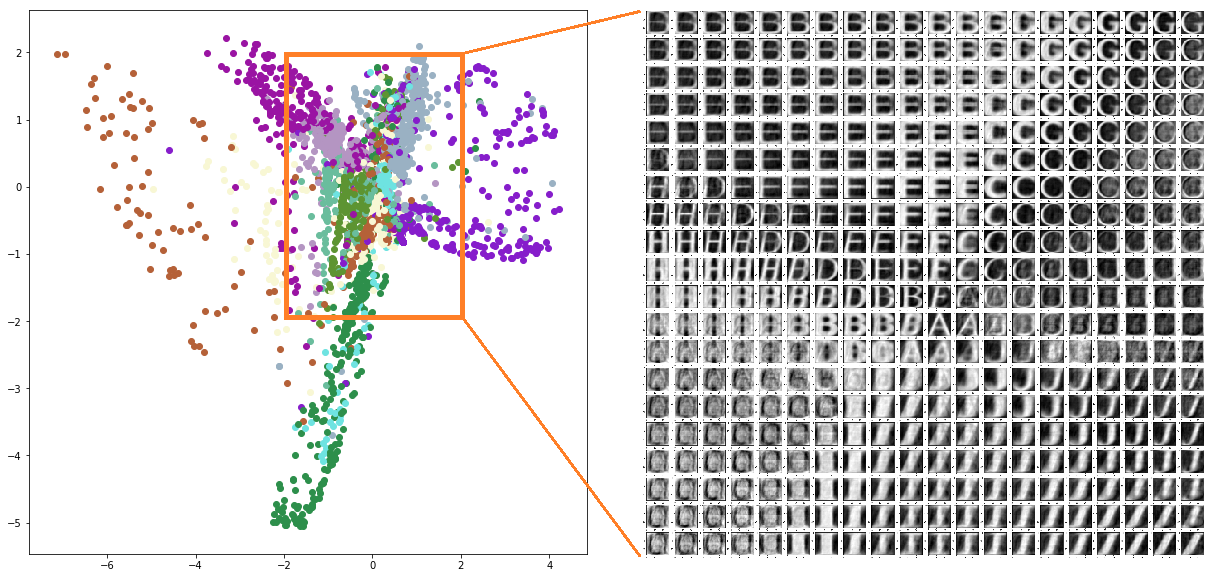
notMNIST 針對所有 training data 求得的 2-d embeddings 如下: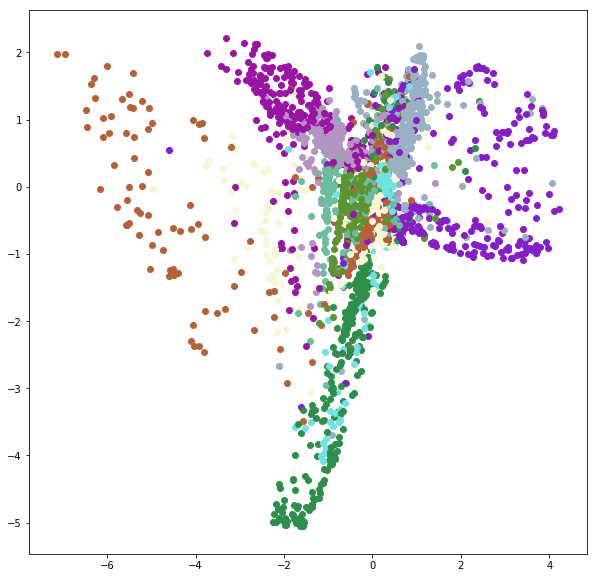
如果只要做到 unsupervised dimension reduction 的話,使用 t-SNE 求得的 embedding 會比上圖都好看很多。但 t-SNE 沒有 Decoder,無法給定一個 embedding 去求回原先的 image。而這種 Encoder - Decoder 結構就相對彈性很多。
t-SNE 的 MNIST 圖如下: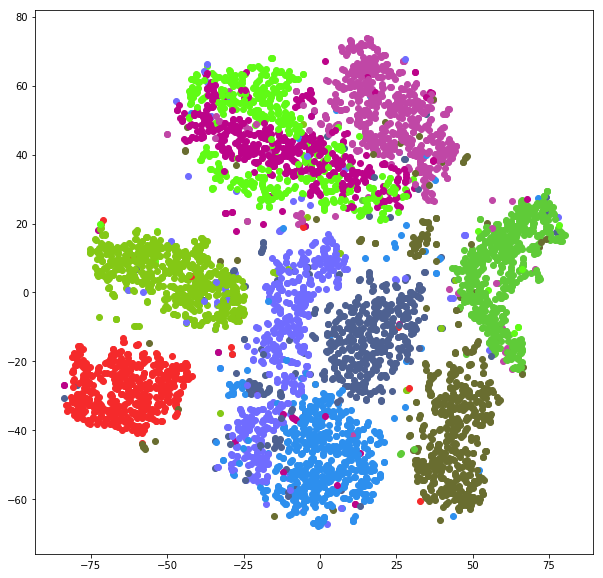
Do Image Generation by Decoder
我們針對 Embedding Space 的一個區域去等距取出很多點,然後使用 Decoder 去 decode 出 image 來。
MNIST 的範圍選擇為, x 軸和 y 軸 [-1~1] 間隔 0.2,共 100 個點。(可參考上面 embedding space 了解選擇的範圍)
notMNIST 的範圍選擇為, x 軸和 y 軸 [-2~2] 間隔 0.2,共 400 個點。(可參考上面 embedding space 了解選擇的範圍)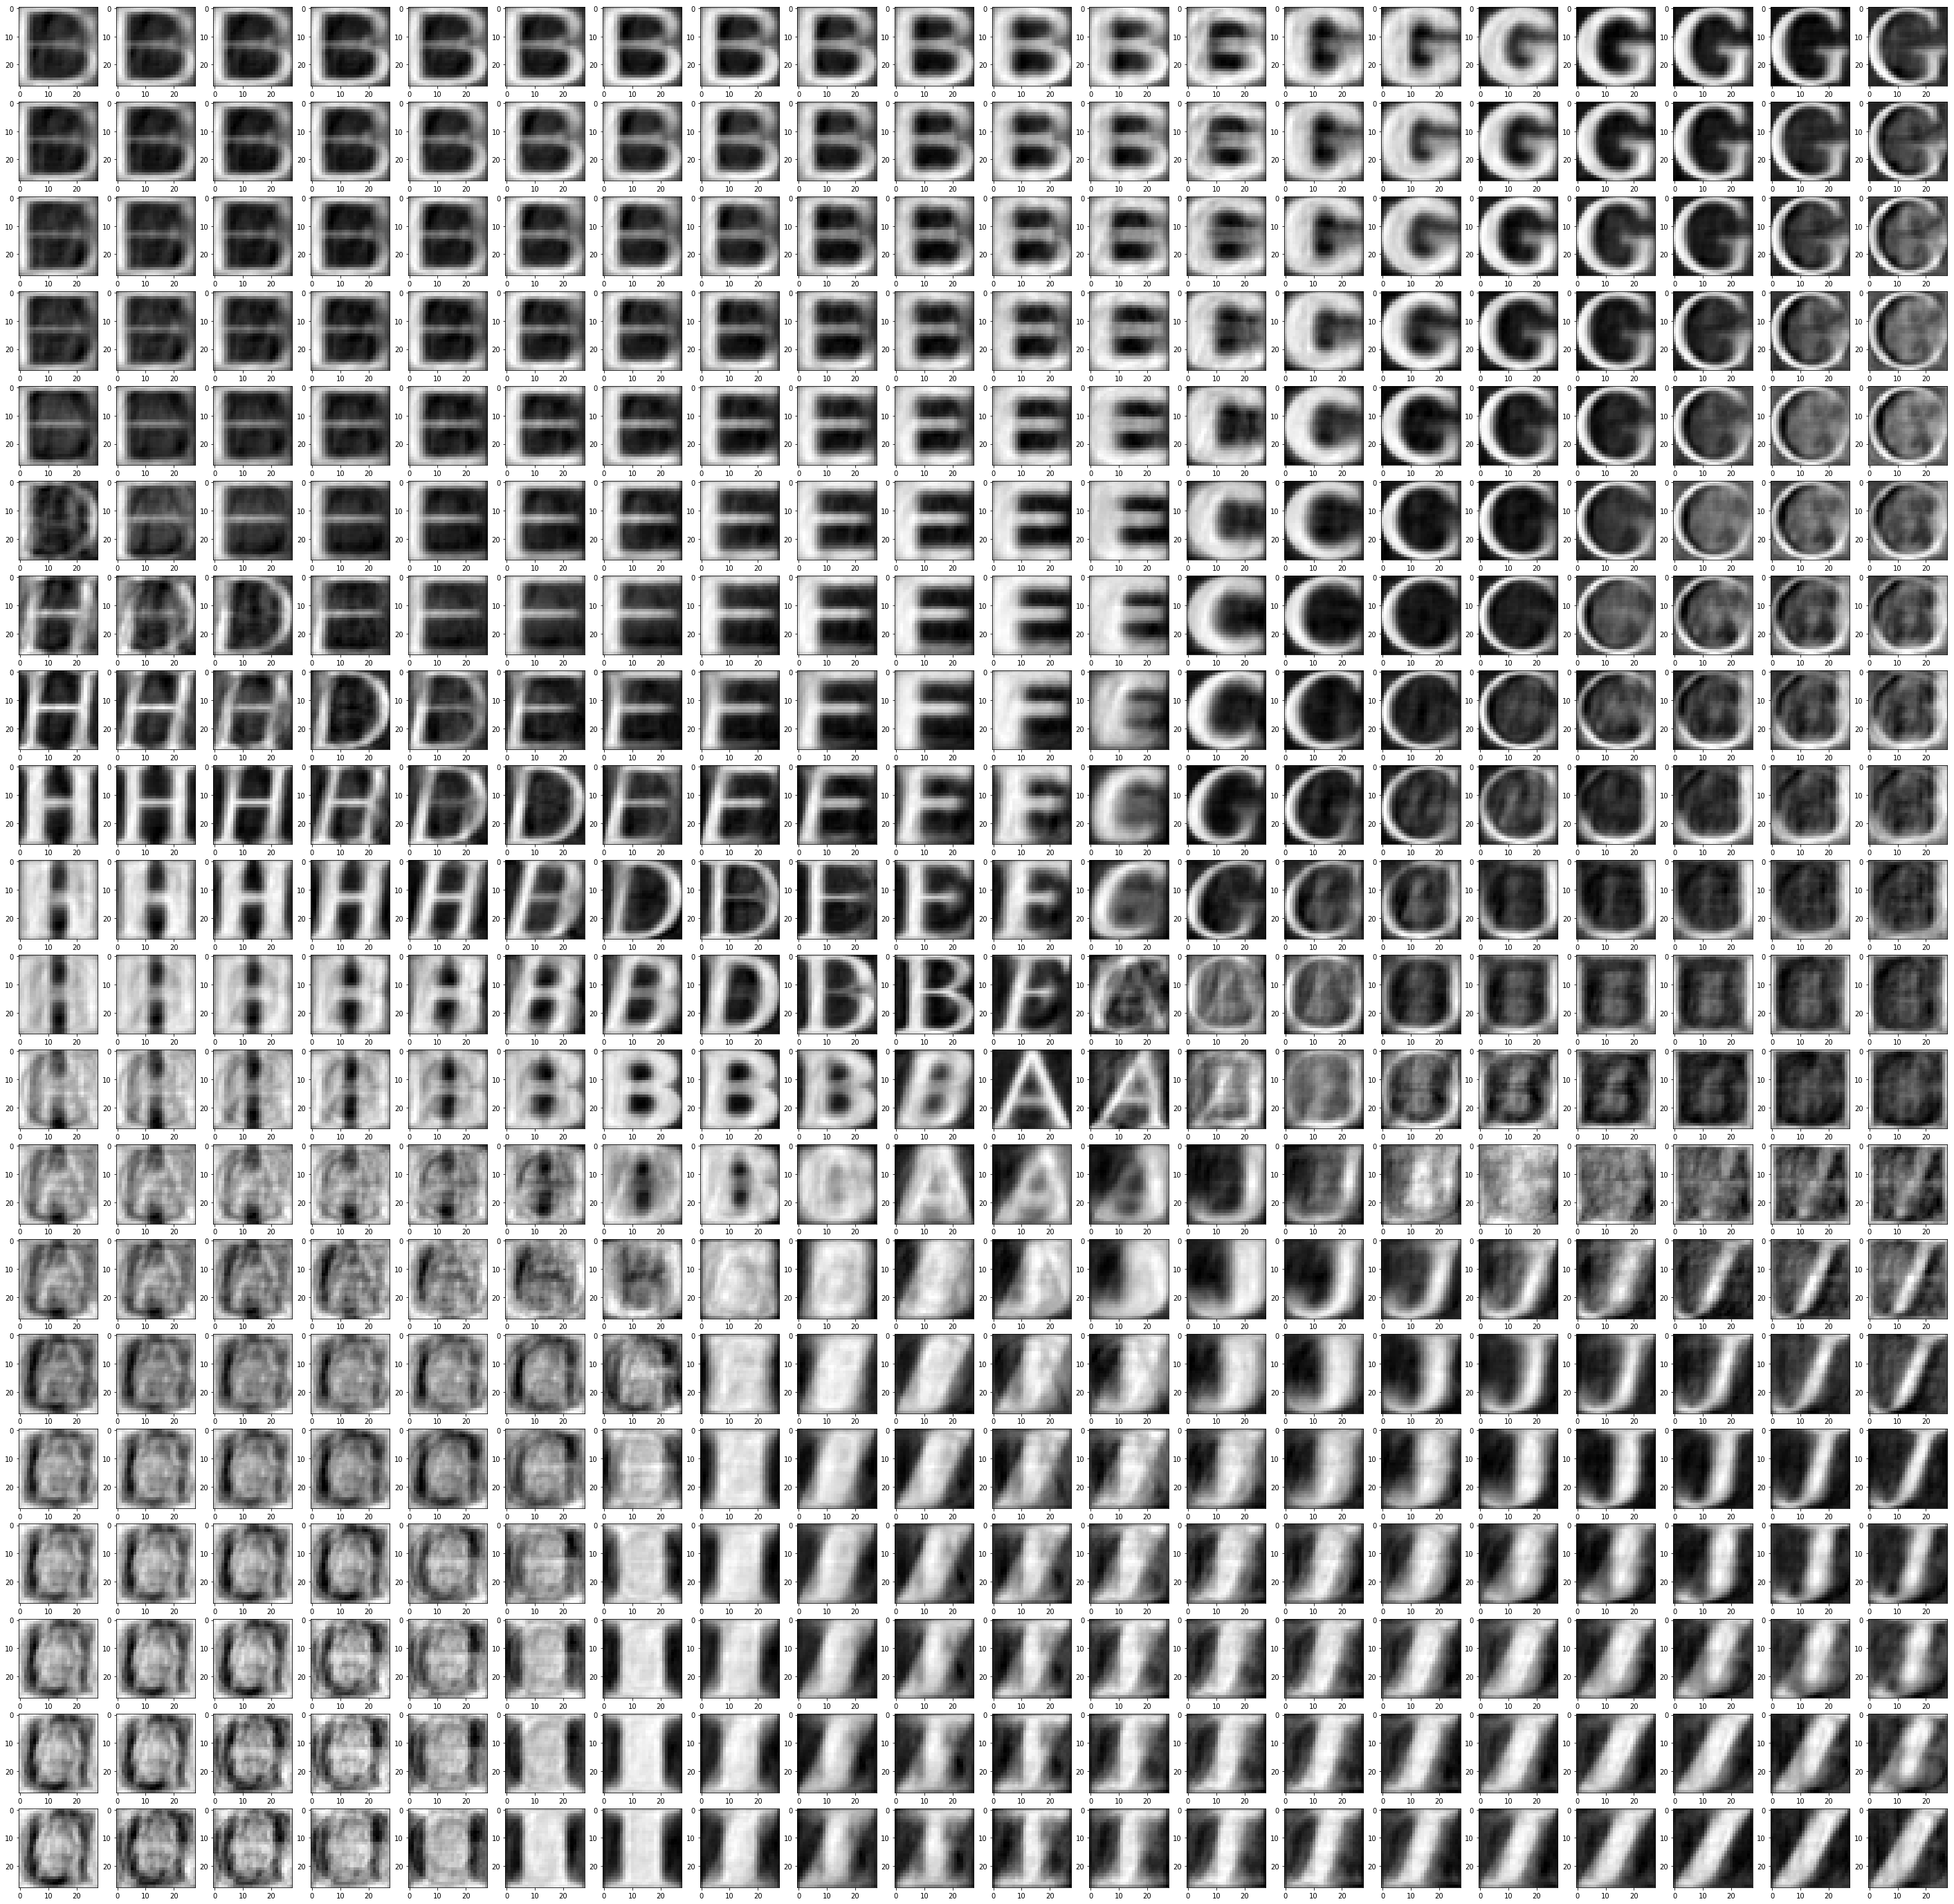
可以發現 embedding space 的兩個維度具有某些意義在!